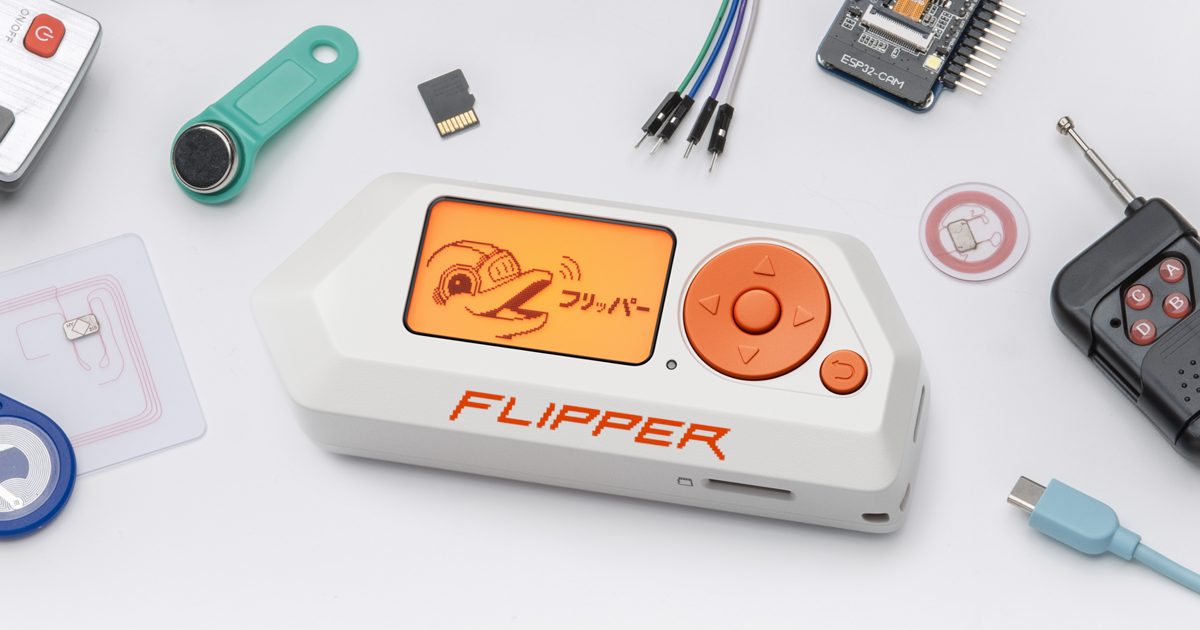
Header image: Official Flipper Zero lifestyle photo with accessories. Image: Flipper Devices. Source: flipper.net.
Disclosure: some links below are Amazon affiliate links (tag cao04-20). Costs you nothing; the picks are the same either way. The Flipper.net links are plain links.
Note: Research was conducted on November 10, 2026 (America/New_York). Firmware versions can change; always verify the latest release on the official sites before flashing.
Part 2 of the Flipper Zero Momentum Beginner Guidebook. This part stays on Official Firmware. The goal is a working device you understand before you decide to flash Momentum in Part 3. If you already skipped Part 1 and just want to get the hardware running, you can start here.
Do not flash custom firmware yet. Finish charge, microSD, first boot, and a stock update first. Official docs want the card in the slot before any firmware update, because databases are copied to the card during the update.
Who this bites
This is for anyone who just unboxed a Flipper Zero, or who has been using one without a reliable card, a desktop app, or a current official firmware build. It assumes you already own the device, or will buy it from Flipper or a listed reseller.
Skip ahead to Part 3 only if the card is already in, the device already boots on Official Firmware, and you have already decided to install Momentum. If Part 1 talked you into staying on Official Firmware, still do this setup. You just will not flash anything in Part 3.
This part is low-risk, but owning the device is still not permission to test other people’s systems. Radio, NFC, and HID how-tos wait for later parts.
What you need
You need the Flipper itself, a USB-C cable that actually carries data (charging-only cables will not talk to qFlipper), and a microSD card. The card is required and is not in the box.
Official sources disagree slightly on the low end of the capacity range. The product page recommends a 2–32 GB card, up to 256 GB supported. The setup docs say a regular 16–32 GB card is sufficient, and that larger cards may take longer to recognize. Both pages agree that 16–32 GB is appropriate. This series stays in that band. A SanDisk 32GB Ultra microSDHC card is one option there. Official docs name SanDisk and Kingston as examples of branded cards, and warn that low-quality cards can cause poor performance and can brick or even damage the device.
The slot supports FAT12, FAT16, FAT32, and exFAT, up to 256 GB. Flipper talks to the card over a slower, energy-efficient SPI interface, not phone-style SDIO. Official docs say it can read at almost 600 KiB/s, which is enough for this device. Do not chase a huge, fast card for its own sake.
If you need a data-capable spare cable, an Anker USB-A to USB-C cable works for charging and qFlipper. Avoid charge-only cables. If you carry the device in a pocket, the official Flipper Zero silicone case and Flipper Zero screen protector (3-pack) are sold on Amazon by Flipper Devices Store; the case is cut out for the GPIO, IR, USB-C, and microSD slot.
The official product page lists a 2100 mAh LiPo and up to 28 days of battery life. It does not publish a charge-time, so this guide will not invent one. Charge it before you start a firmware update, official or otherwise.
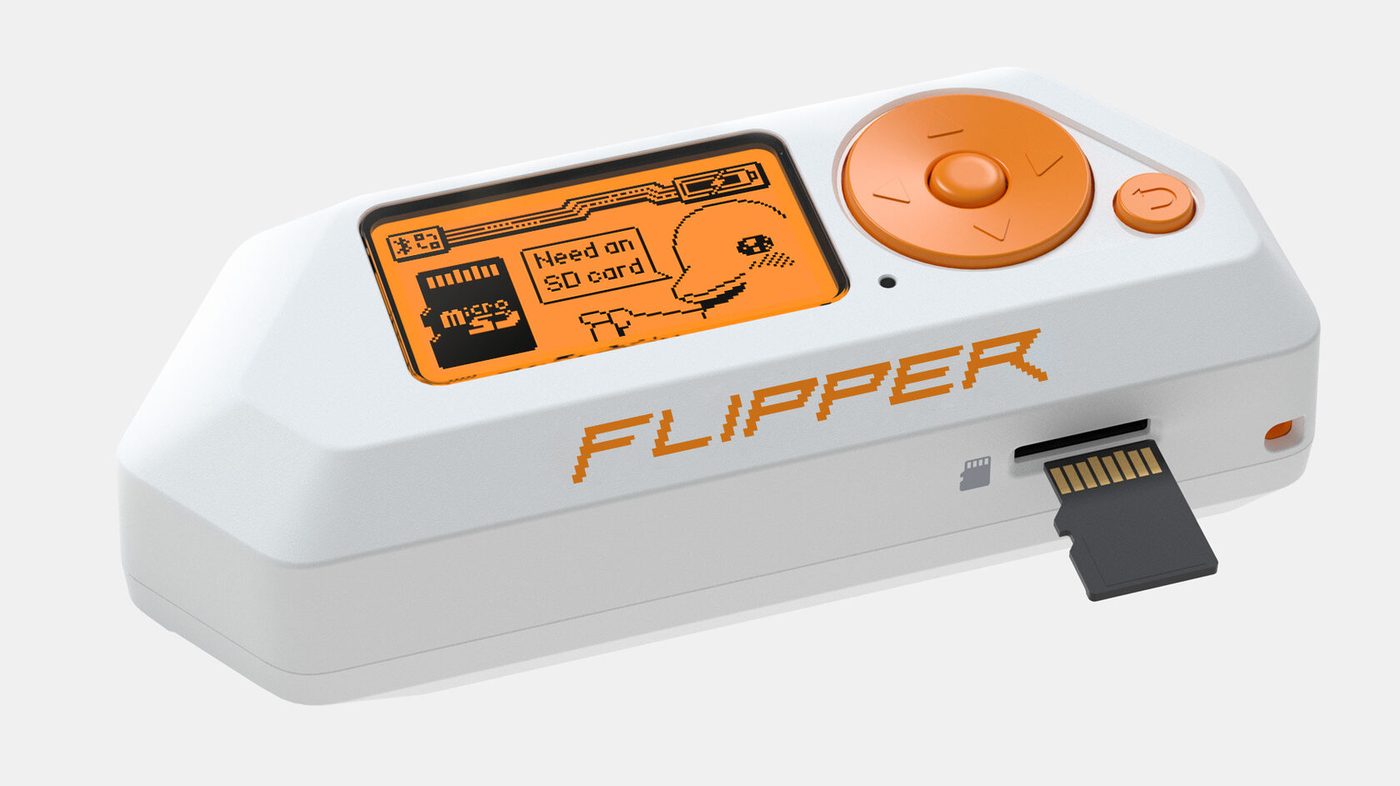
Image: Official Flipper Zero render showing the bottom microSD slot. Image: Flipper Devices. Source: flipperzero.one.
Insert SD, charge, power on
The microSD slot is on the bottom of the device. Hold the card pins facing up, line it up with the slot, and push until it clicks. If the device does not recognize the card, official docs list the usual causes: the wrong or missing filesystem (format it), dust in the slot (compressed air), a card that lacks SPI, or a damaged card (try another one).
To power on, press and hold the BACK button for three seconds. If the battery is fully drained, plug in the USB cable; the device turns on automatically. If it still fails to turn on after charging, official docs say to try press-and-hold LEFT and BACK for five seconds. If it is still dead, follow Flipper’s Firmware recovery from the First Start page. Do not invent extra recovery steps. The same LEFT + BACK hold for five seconds is also the official reboot if the UI freezes.
Format on the device if you need a clean FAT32 card: Main Menu → Settings → Storage → Format SD Card, then press RIGHT to format. That erases all data. After formatting, update firmware again so the databases are reinstalled on the card.
To remove the card, do not yank it. Go to Main Menu → Settings → Storage → Unmount SD Card, wait for the unmounted notice, then push-and-pull the card. Removing it while the device is writing can corrupt data.
One battery note that is easy to misread: official docs say that with the backlight on, current consumption with a genuine branded card is up to 30 mA, and with a non-genuine card it may reach up to 50 mA and shorten battery life. That warning is about card quality, not about choosing 64 GB over 32 GB. If drain seems fast, check Main Menu → Settings → Power → Battery Info.
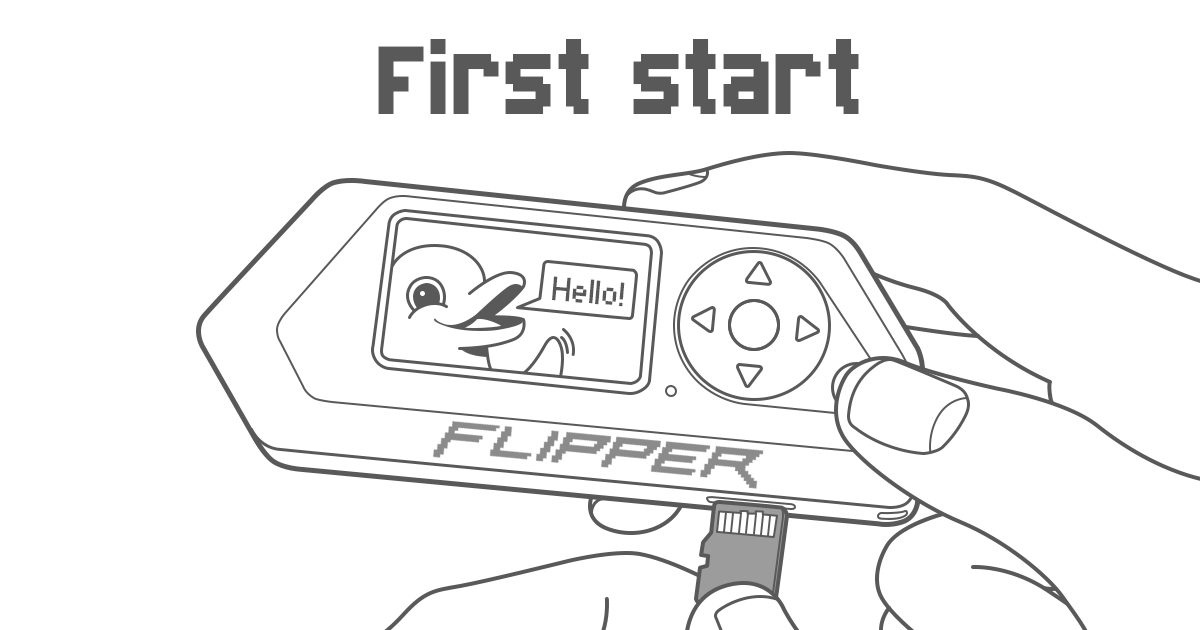
Image: Official Flipper documentation artwork for first start. Image: Flipper Devices. Source: docs.flipper.net.
Official app / qFlipper: why install them now
Install the official tools while you are still on stock firmware. You will use them for a stock update now, for file copies later, and — if you flash Momentum — for one of the install methods in Part 3.
qFlipper is the official desktop app for Windows, macOS, and Linux. It updates official firmware and databases, manages SD files, and can repair corrupted official firmware. Official system requirements: Windows 10 and 11 only; macOS 10.14 or later, optimized for M1 Apple Silicon; Linux via AppImage (make it executable, and install udev rules with ./qFlipper-x86_64.AppImage rules install so you can use it as a normal user). Download it only from Flipper’s official update pages.
Connect over USB with a microSD card already inserted. The main tabs are Device information (hardware and firmware info, update, remote control), Advanced controls (backup, restore, reset, choose firmware), and File manager (upload, download, rename). Same-name uploads overwrite without a warning.
qFlipper’s official firmware channels are DEVELOPMENT (may be unstable), RELEASE-CANDIDATE, and RELEASE (recommended for official firmware). This is the official firmware updater. Do not install Momentum from the official Release channel. Momentum has its own Web Updater and packages; that is Part 3.
The official mobile app (iOS and Android) can update the Flipper over Bluetooth. Pairing: enable Bluetooth in Main Menu → Settings → Bluetooth; in the app tap Connect; enter the pairing code shown on the Flipper; tap Pair. To update: Main Menu tab → Update, then confirm. Official docs say updating via the mobile app may take around 10 minutes. This series will not invent other durations, and it will not claim one official tool is faster or more reliable than the other.
qFlipper can also remotely click buttons and save screenshots from the Device information tab. That is useful later if you want crisp UI photos of your own device.
One backup caveat, even on stock: Momentum’s install wiki, which you will need in Part 3, is clear that qFlipper’s Advanced Controls Backup/Restore does not fully back up saved files. It only backs up settings in the hidden .int folder. A real backup is a copy of the SD files. Do not assume a qFlipper “Backup” button is a full backup.
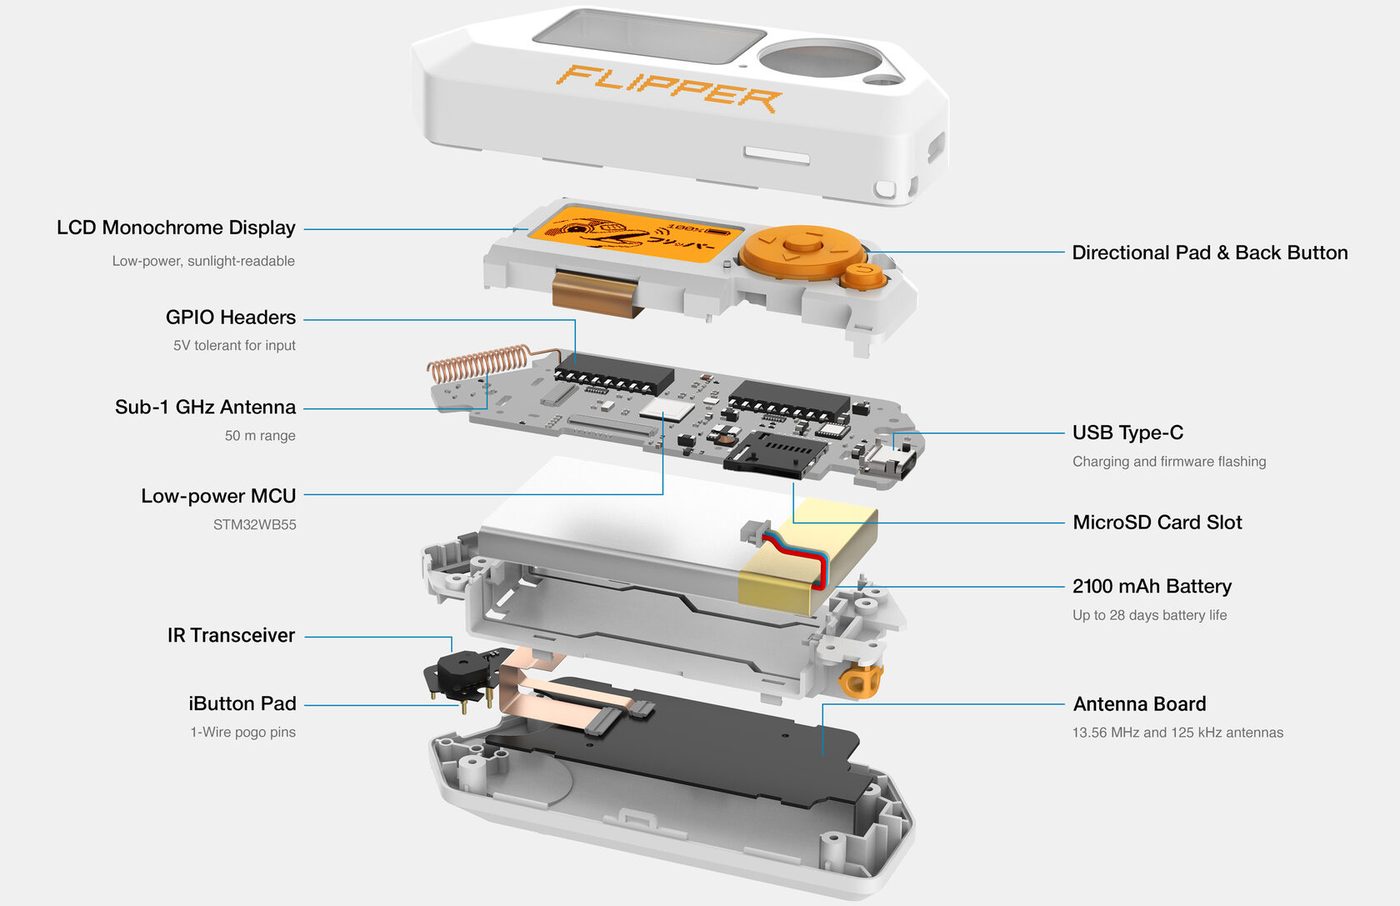
Image: Official Flipper Zero exploded hardware diagram. Image: Flipper Devices. Source: flipperzero.one.
Desktop tour on stock firmware (5-minute map)
You do not need a full annotated menu map yet. Official docs point at a 5-button d-pad plus Back, a Desktop with the dolphin animation, a Main Menu, and Settings. After a stock update, Main Menu → Settings → System is where left-handed mode, units, and time/date format live.
Spend five minutes clicking through the stock apps so you can tell later what Momentum changed. Do not transmit anything you do not own. Deeper radios, NFC, infrared, and BadUSB wait for Parts 6 through 9.
Update stock firmware once (optional but recommended)
Official recommendation is to update official firmware to the latest version right away. Official docs have historically noted that factory firmware can be outdated. Do this with the microSD card already inserted. Use qFlipper’s RELEASE channel, or the mobile app’s Update flow. This is a stock update, not a Momentum install.
If the update fails or the device will not power on afterward, go back to the official First Start recovery path. Do not invent a custom recovery recipe.
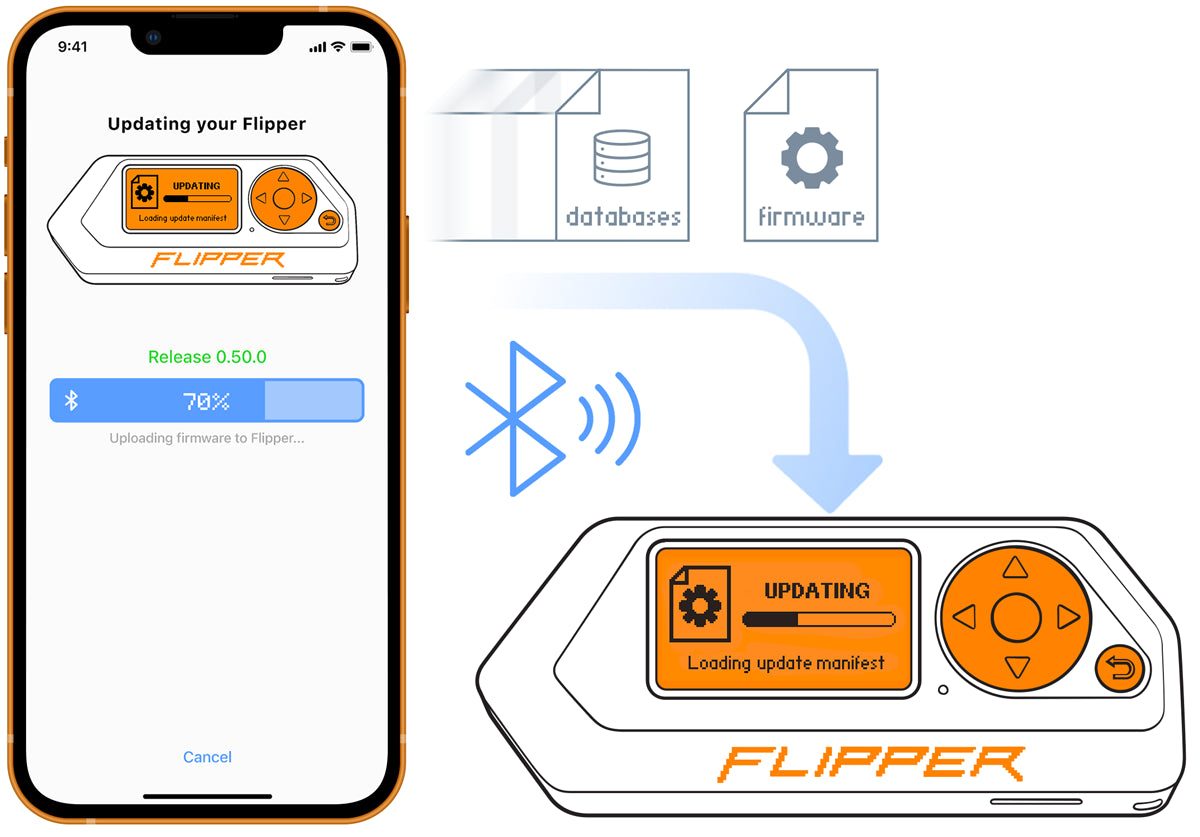
Image: Official Flipper Mobile App screens. Image: Flipper Devices. Source: flipper.net/pages/downloads.
When you’re ready to leave stock
If Part 1’s skip-if still applies — you want the vendor-supported path, you do not want the extra custom-firmware features present on the device, or you are not prepared to follow the legal rules — stay on Official Firmware. You now have a usable stock setup.
If you are going to install Momentum, do a real SD-file backup first, then go to Part 3. Latest mainline, checked November 10, 2026, is still mntm-012 (Web Updater label mntm-012 30.12.25). Re-check before you flash. Dev builds may be newer; this series uses mainline.
Legal and ethics
This guidebook is for learning on hardware and tags you own, or have written authorization to test. Transmitting on restricted frequencies, cloning access credentials, interfering with other people’s devices, or using BadUSB / Bad KB against systems you do not own can be illegal. Custom firmware increases capability; it does not increase your legal rights. When in doubt, don’t transmit and don’t emulate. There is no “bypass building access” framing in this series. Local laws vary.
Checklist
- Buy the Flipper from Flipper or a listed reseller if you do not already own one.
- Buy a branded 16–32 GB microSD card. A SanDisk 32GB Ultra microSDHC card sits in the band both official pages agree on.
- Use a data-capable USB-C cable. An Anker USB-A to USB-C cable is a known spare if you need one.
- Insert the card in the bottom slot, pins facing up, until it clicks.
- Charge the device. Hold BACK for three seconds to power on, or plug in if the battery is dead.
- If the card is not recognized, format it on the device, then run a firmware update so databases are reinstalled.
- Install official qFlipper and/or the official mobile app from Flipper’s own pages.
- Update Official Firmware on the RELEASE channel or via the mobile app, with the card inserted.
- Copy the SD files to a computer if you already have saved data. Do not rely on qFlipper Backup/Restore alone.
- Only then decide whether to continue to Part 3 or stay on Official Firmware.
FAQ
Why isn’t a microSD card included?
Official docs are blunt: you need a card to use the device, and it is sold separately. The card holds keys, remotes, databases, and later Asset Packs. This series treats a card as mandatory.
Should I buy a 64 GB or 128 GB card?
You can, up to 256 GB, but official setup docs say a regular 16–32 GB card is sufficient and that larger cards may take longer to recognize. This series stays in the 16–32 GB band both official pages agree on.
Can I install Momentum from qFlipper’s RELEASE channel?
No. RELEASE, RELEASE-CANDIDATE, and DEVELOPMENT are official firmware channels. Momentum is installed with Momentum’s Web Updater, a .tgz via qFlipper’s “Install from file,” the Lab/App link, or a manual SD zip. That is Part 3.
Is qFlipper Backup a full backup?
No. It only backs up settings in the hidden .int folder. Copy the SD files.
The Flipper will not turn on. What should I try first?
Charge it. A fully drained unit should power on when plugged in. Then try LEFT + BACK for five seconds. If it is still dead, follow official Firmware recovery on the First Start page.
The bottom line
Get the card in, charge the battery, learn the stock desktop, and update Official Firmware with the official tools. That is the whole job of this part. Momentum waits until Part 3, and only if you still want it after Part 1’s skip-if.
Previous: Part 1 – Flipper Zero Custom Firmware: Why Momentum for Beginners Next: Part 3 – Install Momentum Firmware on Flipper Zero: Web Updater, qFlipper, and Mobile
Sources
6 refs- https://docs.flipper.net/zero/basics/first-startdocs.flipper.net
- https://docs.flipper.net/zero/basics/sd-carddocs.flipper.net
- https://docs.flipper.net/zero/qflipperdocs.flipper.net
- https://flipperzero.one/flipperzero.one
- https://momentum-fw.dev/wiki/Installationmomentum-fw.dev
- https://github.com/Next-Flip/Momentum-Firmware/releases/tag/mntm-012github.com
comments
loading comments…
No comments yet. Start the thread.